- All
- Product Name
- Product Keyword
- Product Model
- Product Summary
- Product Description
- Multi Field Search
Kaiping Yingchuan Sanitary Ware Technology Co., Ltd
304/316 stainless steel sanitary ware manufacturer
 English
Views: 0 Author: Site Editor Publish Time: 2026-01-26 Origin: Site


Are you thinking about upgrading your kitchen with a new fixture? Installing a new kitchen faucet yourself can seem like a daunting task, but it’s a manageable project for most homeowners. Whether you're opting for a sleek minimalist faucet or a functional single hole kitchen faucet, this guide will walk you through every step. You can save money on professional plumbers and gain a sense of accomplishment by tackling this DIY project. This article provides detailed, easy-to-follow instructions to help you successfully install your new kitchen faucet.
Proper preparation is the key to a smooth installation process. Before you even think about removing your old fixture, what are the initial steps you need to take? Taking the time to gather your tools and prepare your workspace will prevent multiple trips to the hardware store and make the entire process much more efficient. A successful installation begins long before you turn the first wrench.

To ensure your kitchen faucet installation goes off without a hitch, you'll need a specific set of tools. Having everything on hand before you start is crucial. Most of the required tools are common household items, but you might need a basin wrench for tight spaces under the sink. This tool is specially designed to reach the nuts that hold your old kitchen faucet in place. Getting the right tools for your new single hole kitchen faucet is the first step toward a leak-free setup.
Tool | Purpose |
|---|---|
Basin Wrench | To loosen or tighten nuts in hard-to-reach places under the sink. |
Adjustable Wrench | For disconnecting and connecting water supply lines. |
Bucket | To catch any residual water from the supply lines or old faucet. |
Rags or Towels | For cleaning up spills and drying the work area. |
Flashlight or Headlamp | To illuminate the dark space under your kitchen sink. |
Plumber's Putty or Silicone | To create a watertight seal between the faucet and the sink. |
Safety Glasses | To protect your eyes from debris and dust. |
Your work area under the sink is likely cramped and dark. How can you make it more accessible and comfortable? First, clear out all cleaning supplies, trash cans, and other items to give yourself as much room as possible. Place a bucket and some old towels directly under the water supply connections to catch any drips. A flashlight or headlamp will be your best friend, illuminating the P-trap and supply lines. This simple preparation makes working on your new minimalist faucet much easier.
With your workspace prepped, it's time to remove the old fixture. This part of the process can sometimes be more challenging than installing the new one, especially if the old kitchen faucet is corroded. What are the essential steps to safely remove it?
First and foremost, you must turn off the water supply. Look for the shutoff valves under the sink, one for hot and one for cold. Turn them clockwise until they are fully closed. Then, turn on the old faucet to release any remaining pressure and drain the water left in the lines.
Next, use an adjustable wrench to disconnect the hot and cold water supply lines from the faucet. Have your bucket ready to catch any water that drains out. Once the lines are disconnected, you can use a basin wrench to loosen the mounting nuts that secure the old kitchen faucet to the sink. This is often the most difficult step. After the nuts are off, you should be able to lift the old kitchen faucet straight out from the top of the sink. Finally, take a moment to thoroughly clean the sink surface, removing any old putty or grime. This prepares the surface for your beautiful new single hole kitchen faucet.
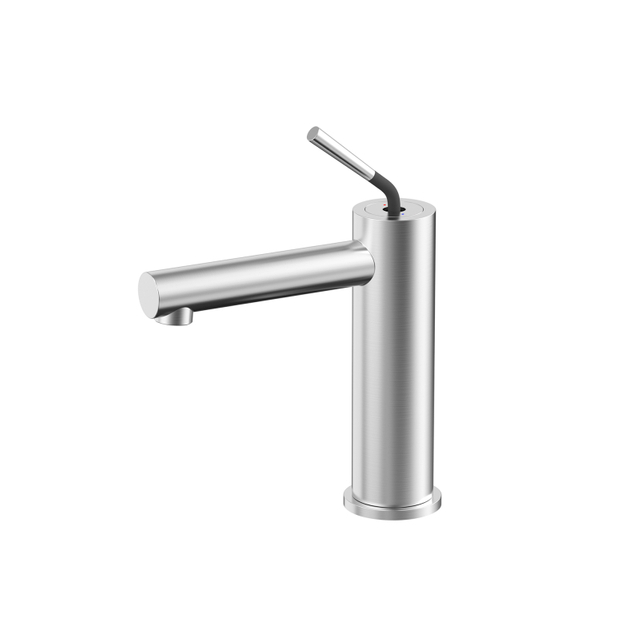
Now for the exciting part: installing your brand-new minimalist faucet. A single hole kitchen faucet is a popular choice for modern kitchens due to its clean look and simple installation. How do you correctly install this type of kitchen faucet?
Your new kitchen faucet will come with a rubber or plastic gasket. This gasket goes between the base of the faucet and the sink surface. If your faucet didn't come with one, you can apply a thin bead of plumber's putty around the base of the kitchen faucet to create a waterproof seal.
From the top of the sink, feed the faucet's water lines and threaded shank through the hole. If you're installing a single hole kitchen faucet in a sink with three holes, use the included deck plate to cover the unused holes. From underneath the sink, slide the washer and mounting nut over the shank and hand-tighten it. Before you fully tighten the nut, check the faucet's alignment from above to ensure it's straight. Once you are happy with the position of your new minimalist faucet, use your basin wrench to tighten the nut securely, but be careful not to overtighten.

With the kitchen faucet firmly mounted, it's time to connect the water lines. Many new faucets come with integrated supply lines. If so, you can connect them directly to the shutoff valves. The line for hot water is typically marked with a red indicator, while the cold is marked with blue. If your new kitchen faucet has shorter lines, you may need to purchase flexible connector lines of the appropriate length.
Wrap the threads on the shutoff valves with plumber's tape to ensure a tight seal. Then, attach the supply lines and tighten them with an adjustable wrench. Just like with the mounting nut, tighten them until they are snug, but avoid overtightening, which can damage the fittings. This is a critical step for your new kitchen faucet installation.
This is the moment of truth. Before you put everything back under the sink, you need to check your work. What is the best way to test your new minimalist faucet? Slowly turn the water supply valves back on by rotating them counter-clockwise. Check all connection points—where the supply lines meet the shutoff valves and where they connect to the kitchen faucet—for any drips.
Turn the faucet handle on and let both hot and cold water run. Check for leaks again. If you see any drips, turn the water off and gently tighten the leaking connection a quarter turn. Repeat until there are no leaks. A leak-free installation ensures your new single hole kitchen faucet will function perfectly for years. Congratulations on successfully installing your new kitchen faucet!
A single hole kitchen faucet is a type of faucet that requires only one hole in the countertop or sink for installation. It combines the spout and handles into a single unit, offering a clean, minimalist faucet look that is popular in contemporary kitchens.
Yes, absolutely! Installing a kitchen faucet is a very achievable DIY project for homeowners with basic plumbing knowledge and the right tools. Following a step-by-step guide makes the process straightforward.
It depends on the kitchen faucet model. Many modern faucets, including the popular minimalist faucet styles, come with a rubber gasket that creates a seal, eliminating the need for putty. However, if your faucet does not include a gasket, using plumber's putty is recommended to ensure a watertight seal.
For someone with a bit of DIY experience, installing a new kitchen faucet typically takes about one to two hours. This includes removing the old faucet, cleaning the area, and installing the new single hole kitchen faucet.
For those seeking a high-quality, durable, and stylish fixture, we highly recommend considering a yc faucet. A yc faucet combines elegant design with superior performance, making it an excellent choice for any modern kitchen upgrade. Installing a yc faucet is a great way to enhance both the look and functionality of your space. Their minimalist faucet designs are particularly well-suited for a clean aesthetic.

Email: qioio@ycfaucet.com
Phone: +86-180 3312 2096